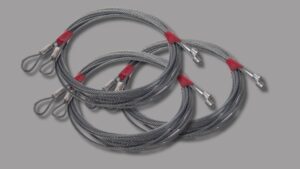
Garage doors play a crucial role in securing our vehicles and belongings, and the cables are essential to their proper functioning. Over time, garage door cables may wear out or break, leading to potential safety hazards and operational issues. However, you can replace these cables with the right tools and a systematic approach. This step-by-step guide will walk you through replacing garage door cables, ensuring a smooth and hassle-free experience.
Importance of Functioning Garage Door Cables
Garage door cables play a crucial role in ensuring your garage door’s smooth and safe operation. These cables are responsible for lifting and lowering the door, working with the springs to counterbalance the door’s weight. When the wires are functioning correctly, they help to prevent the entry from slamming shut or dropping suddenly, which can be dangerous and cause injury.
In West Warwick, RI, it is essential to ensure that your garage door cables are in good working condition due to the harsh winter weather conditions. Cold temperatures can cause metal components to become brittle and more susceptible to breaking or wearing down. Regular maintenance and inspection of your garage door cables by a professional can help to identify any issues early on before they become more serious problems. By maintaining the proper functionality of your garage door cables, you can ensure that your garage door operates smoothly and safely all year round.
Signs That Your Garage Door Cables Need to be Replaced

Several signs indicate your garage door cables may need to be replaced in West Warwick, RI. Here are some common indicators to look out for:
- Frayed or Damaged Cables: Inspect the lines closely for any signs of fraying, unraveling, or visible damage. If the wires appear worn out or wear and tear, they should be replaced.
- Uneven Door Movement: If your garage door moves unevenly or crookedly when opening or closing, it could indicate cable issues. Damaged cables can cause the door to become misaligned and affect its smooth operation.
- Sluggish Door Operation: If your garage door is moving slower than usual or struggling to open or close, it could be due to worn-out cables. The cables are crucial in supporting and facilitating the door’s movement, and damaged lines can hinder smooth operation.
- Snapped or Loose Cables: In some cases, garage door cables may snap or become loose. If you find a streak that has completely snapped or is hanging loosely, it indicates that it needs immediate replacement.
- Excessive Noise or Jerking Movements: When operating your garage door, pay attention to any unusual noises or jerking movements. Damaged cables can cause the door to work with increased noise, vibrations, or sudden jerks.
- Visible Wear on Bottom Roller Bracket: Inspect the bottom roller bracket where the cables are attached. If you notice any signs of wear, such as cracks or deformation, it may indicate that the lines are putting excess strain on the bracket and need replacement.
- Previous Cable Failure: If your garage door cables have been replaced in the past, and it has been a significant amount of time since the replacement (typically, they last around 5-7 years), it might be time for a new set of cables.
Tools and Materials Needed

Before you begin the cable replacement process, gather the following tools and materials:
- Safety glasses and gloves: Protect yourself from any potential accidents or injuries.
- Wrench set and socket wrench: These tools will help you loosen and tighten bolts and nuts.
- Adjustable pliers: Used for holding and bending various components.
- Ladder: A sturdy ladder will allow you to access different garage door parts safely.
- Replacement cables: Measure the length of the old wires and purchase suitable replacements.
- Replacement bottom brackets and rollers (if necessary): Inspect the existing frames and rollers for damage and replace them.
- Cable cutters: Essential for cutting old cables to remove them.
Precautions and Safety Measures
When replacing garage door cables in West Warwick, RI, it’s essential to prioritize safety to avoid accidents or injuries. Here are some precautions and security measures to consider:
- Disconnect the power: Before starting any work on the garage door, disconnect the power to the opener to prevent accidental activation or electrocution. This usually involves unplugging the opener from the electrical outlet or turning off the circuit breaker.
- Wear protective gear: Wear safety glasses or goggles to protect your eyes from flying debris or loose parts. Wear work gloves to protect your hands from sharp edges or pinching.
- Release tension in the springs: Garage door springs are under high pressure and can cause serious injury if mishandled. Follow the manufacturer’s instructions or consult a professional to properly release the tension in the springs before working on the cables.
- Secure the door: Use locking pliers or clamps to secure the garage door while you work on the wires. This prevents the door from unexpectedly falling or moving, which could cause injury.
- Use proper tools and techniques: Ensure you have the appropriate tools for the job and familiarize yourself with the correct cable replacement procedures. Improvising with adequate tools or formal methods can lead to accidents.
- Work with a partner: Having someone assist you during the cable replacement process is recommended. They can help support the door, hand you tools, or provide an extra set of eyes for safety.
- Check the condition of other parts: While replacing the cables, take the opportunity to inspect the overall condition of the garage door system. Look for signs of wear, damage, or misalignment in other components, such as springs, pulleys, rollers, and tracks. Replace or repair any faulty parts as needed.
- Follow manufacturer’s instructions: Read and follow the specific instructions provided by the manufacturer of the garage door and the replacement cables. They will guide proper installation and safety precautions for your door model.
- Consult a professional if you need more clarification: If you are uncertain about replacing the garage door cables or encounter unexpected difficulties, you should seek assistance from a professional garage door technician. They have the knowledge and experience to handle the job safely and effectively.
Removing the Old Cables
- Release tension from the cables: Pull the emergency release cord to disengage the opener and manually open the door to release tension from the wires.
- Disconnect the lines from the bottom brackets: Loosen the nuts holding the cables to the bottom shelves using a wrench or socket wrench. Once loosened, remove the wires from the stands.
- Remove the lines from the drums: Locate the cable drums at the top of the door, typically on either side. Use a wrench to loosen the set screws on the drums and slide the cables out.
- Cutting the old lines: Using cable cutters, carefully cut the old wires to remove them entirely from the garage door.
Installing the New Cables
- Thread the new cables through the drums: Begin by inserting the new wires through the cable drums, ensuring they are correctly aligned.
- Attach the new lines to the bottom brackets: Secure one end of the new cable to the bottom frame. Tighten the nut using a wrench or socket wrench.
- Wind the wires around the drums: Starting with one side, wind the new cables evenly around the drums, ensuring they are correctly aligned.
- Tensioning the wires: Using a wrench, tighten the set screws on the drums to create tension in the cables. Be cautious to avoid over-tightening.
Testing and Final Adjustments
When it comes to replacing garage door cables in West Warwick, RI, you should follow a few essential steps to ensure a successful and safe installation. Here is a guide to help you with the testing and final adjustments process:
- Gather the necessary tools: Before you begin, ensure you have all the required tools for the job. This typically includes safety gloves, adjustable wrenches, locking pliers, winding bars, a ladder, and new garage door cables.
- Safety first: Ensure the garage door is fully closed and disconnect the power to the garage door opener to avoid accidental movements during the replacement process. It’s also recommended to wear safety goggles to protect your eyes.
- Release tension from the old cables: Locate the torsion springs, usually mounted above the garage door opening. Use the winding bars to unwind the pressure from the springs. This step is crucial to prevent any injuries while removing the old cables.
- Remove the old wires: Once the pressure is released, detach the old threads from the bottom brackets of the garage door. You may need pliers or a wrench to loosen any fasteners or clips holding the wires in place.
- Install the new cables: Throw the new wires through the bottom brackets of the garage door. Ensure they are correctly aligned and secured. Follow any specific instructions the manufacturer provides for your particular garage door model.
- Reapply tension to the springs: Gradually apply pressure to the torsion springs using the winding bars. This step requires caution and precision, as overtightening or uneven stress can lead to imbalanced door movement. If you need clarification on this process, it’s best to seek professional assistance.
- Test the door: After the cables are installed and the tension is adjusted correctly, test the garage door’s movement. Open and close the door a few times to ensure it operates smoothly and without issues. Listen for any unusual sounds or signs of misalignment.
- Final adjustments: If necessary, make any final adjustments to the tension or cable alignment to ensure the door’s proper functioning. Use the manufacturer’s instructions or consult a professional if you encounter difficulties.
Conclusion
In conclusion, True Garage Door in West Warwick, RI, provides a comprehensive and reliable solution for replacing garage door cables. By following the step-by-step guide outlined in this blog, homeowners can confidently tackle this task with ease, ensuring the safety and functionality of their garage doors. With True Garage Door’s expertise and commitment to customer satisfaction, residents of West Warwick and the surrounding areas can trust them for all their garage door needs. For any further inquiries or to schedule a professional cable replacement service, don’t hesitate to contact True Garage Door today.


